Thursday, January 23, 2014

Do It Yourself: Custom Headboard

I typically only blog about food but last weekend I finally decided to complete my headboard, and just had to show you how easy it is.  I have always wanted an upholstered headboard but there are so many styles, fabrics, and patterns to choose from.....the possibilities are countless.  A few weeks back I finally came across the below fabric (it is actually a curtain) and loved it.  It combined all of the colors involved in our bedroom. 


Materials:
Plywood or Drywall
Fabric
Staple Gun
Scissors
2 - 2x4

 I had Scott work on the frame.  He actually had some drywall hanging around so we decided to use that.  I sketched out a design and he cut it out so I could get to work!


I began by cutting two pieces of batting the length and width of the drywall.  One at a time, lay them flat on the floor and staple along edges.  Be sure to pull tight so that it will be flat and not bumpy.  I stated with the top, then the bottom, followed by the sides and lastly the curves at the top.  Repeat with the second piece of batting.


Before attaching the fabric, cut the 2x4 (if needed) to fit across the length of your headboard, about 12 inches below the top.  You can use the same size or a smaller one to add to the bottom just to balance the headboard against the wall once you hang it (see below). Screw these in from the front.


Be sure that your fabric is wrinkle free before attaching.  Lay the fabric flat on the floor and attach in the same manner as the batting.  If you are using a pattern (especially is there are stripes of any kind) you want to make sure that the fabric is straight as well.  Attach the ring hangers to the top 2x4 (make sure to measure where you will hang it before attaching hangers, you want to make sure you have stud where it will attach to the wall) and you are ready to hang it up on the wall!


Normally upholstered headboards can end up costing you 100's even 1000's of dollars depending on style, company and fabric choices.  By doing it yourself, this only cost me a little under $20, not including the items I already had hanging around!  By doing it this way it it also makes it very easy to remove and change the fabric when you feel like you need a change, Happy Crafting! 

Wednesday, January 22, 2014

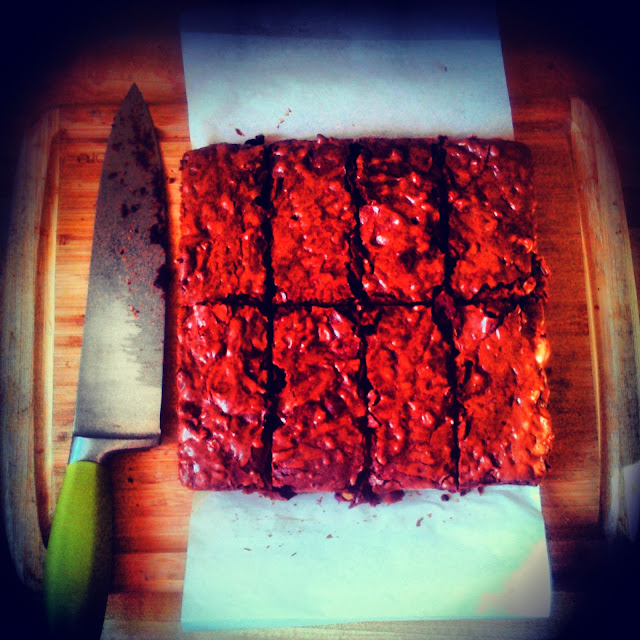
Snow Day Brownies


I have to say that I have definitely had enough snow this winter and I am ready for warmer, longer days.  On the plus side, this snow has made today a "snow day".  While Scott is out hard at work removing snow from countless homes I decided to whip up some brownies for when he gets home, as well as throw some Italian Herb Chicken in the crock pot for dinner.  These brownies are super simple and most people will already have all the ingredients needed in their fridge and pantry.  Here is what you will need to get started:    


10 Tablespoons Unsalted Butter
1 Cup of Sugar
3/4 Cup of Cocoa Powder
1/2 Teaspoon of Salt
2 Teaspoons of Vanilla
2 Large Eggs
1/2 Cup of Flour
3/4 Cup Chopped Walnuts
1/2 Cup Mini Semi-Sweet Chocolate Chips


In a medium saucepan bring about 2 inches of water to a simmer.  In a heat safe bowl, combine the butter, sugar, cocoa and salt.  Place the bowl on the pan of simmering water until the butter is melted, stirring occasionally. Once melted, remove bowl from pan and let cool about 5 minutes.


Stir in the vanilla.  Next, add the eggs one at a time stirring well after each addition.  Once well mixed, stir in the flour until combined.  Lastly, beat with a wooden spoon for about 2 minutes.  Batter will be very thick.


Finally, stir in the nuts and chips.


Spread batter into a parchment lined 8x8 pan and bake for 20-30 minutes in a 325 degree oven.  


Remove from pan and let cool for about 15 minutes before slicing.  Eat alone or topped with vanilla ice cream for a brownie sundae. Or for Super Bowl Sunday cut into little footballs and, with a stencil, dust with powdered sugar! Enjoy!

Tuesday, January 7, 2014

Eggnog Rice Pudding

So now that the holidays are done you most likely have some leftover eggnog lurking in the fridge and just can't drink another glass.  I know that I did and also had some leftover rice from dinner, which got me thinking.....how about some eggnog rice pudding! I threw a few things together not expecting much but let me tell you AMAZING! Now my only problem is I threw it together so I measured nothing, which is why I am currently making another batch to make sure I let you know how to make it correctly. So here is what you will need.


2 cups of cooked white or jasmine rice
1 1/4 cup of eggnog
1/4 cup brown sugar
1 tablespoon honey 
1 egg (beaten)
1 tablespoon unsalted butter
1 teaspoon cinnamon
1 tablespoon vanilla extract 
Raisins are optional and can be added to taste


In a medium pan add the rice, 1 cup of eggnog, sugar and honey. Cook on medium/low for about 10 minutes or until thick and creamy, storing occasionally. Next, in a small bowl beat the egg with 1/4 cup of eggnog.  One the rice mixture is ready add a small amount of the rice to the egg mixture to temper the mixture before adding it to the pan. Add this mixture to the pan and cook on low for about 2 minutes, stirring constantly.  Remove from heat and add the butter, vanilla and cinnamon (raison as well, if you choose to). Top with cinnamon, and or whip cream and serve warm. Enjoy!